Introduction
Security has always been a top of mind for organizations, but protecting every angle of the network remains a challenge. At the same time, ensuring an optimal application and user experience is equally important. Organizations have often had to choose between security-focused and performance-driven solutions, leading to increased management and operational complexity.
Cisco Secure Access is a robust solution that addresses these challenges. It offers top notch security by integrating advanced technologies and access controls. This means that users can get a secure and direct connectivity from SD-WAN sites to the internet and SaaS Apps.
Let’s see how it works
SD-WAN Meets Secure Access
Starting with SD-WAN version 20.13/17.13, an integration with Secure Access is now available out of the box.
With this integration, automatic IPSec tunnels can be established to the primary and secondary Secure Access Data Centers closest to your router’s location, ensuring optimal performance. These tunnels route traffic while enforcing your organization’s security policies, providing a simple and powerful way to improve both security and connectivity.
At the core of Secure Access are Network Tunnel Groups (NTGs), which manage IPSec connections. Each NTG includes a primary and a secondary Secure Access Data Center. While configuring tunnels to both data centers is not mandatory, it is highly recommended to ensure high availability in case one becomes unavailable.
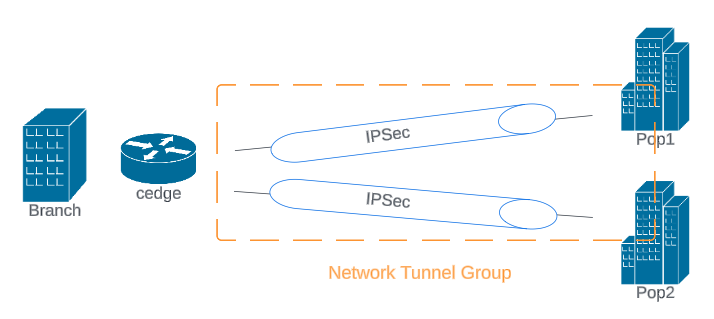
It is possible to configure up to 16 tunnels, 8 active and 8 backup, allowing for load balancing across active tunnels to increase the available bandwidth.
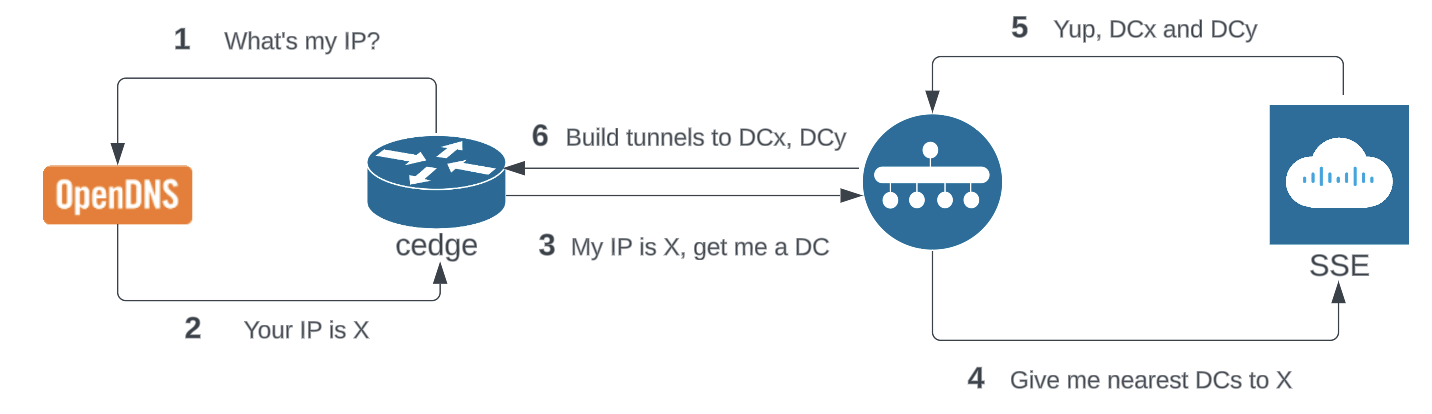
To automatically establish the tunnels, the SD-WAN Manager and router need internet connectivity and DNS lookup enabled. This allows the device to determine its own public ip address, communicate it to the Manager and get assigned the nearest primary and secondary SSE Data Centers.
Once the tunnels are established, traffic going through them will be secured by the core security features of SSE: FWaaS, CASB, ZTNA and SWG and more.
Configuration Steps
Create API Key
To start, on SSE create an API key for the Manager to securely connect. Make sure the following privileges are granted:
- Deployment / Network Tunnel Group - Read/Write
- Deployment / Tunnels - Read/Write
- Deployment / Regions - Read
You will get your API Key and Key Secret
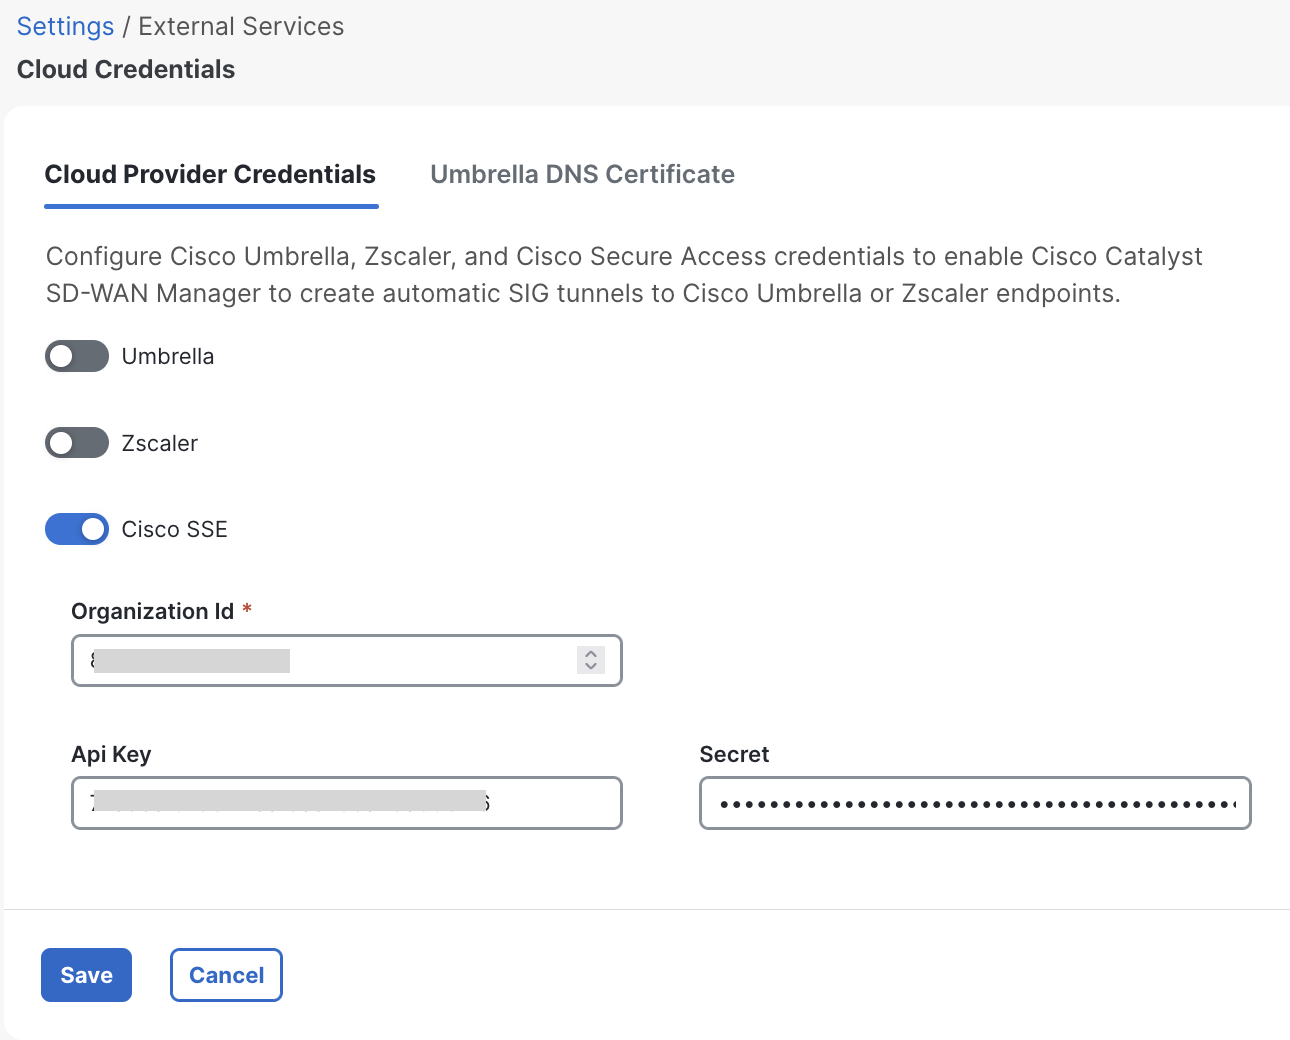
Enter Credentials on the Manager
Next, input the information on the SD-WAN Manager under Administration > Settings > Cloud Credentials > SSE
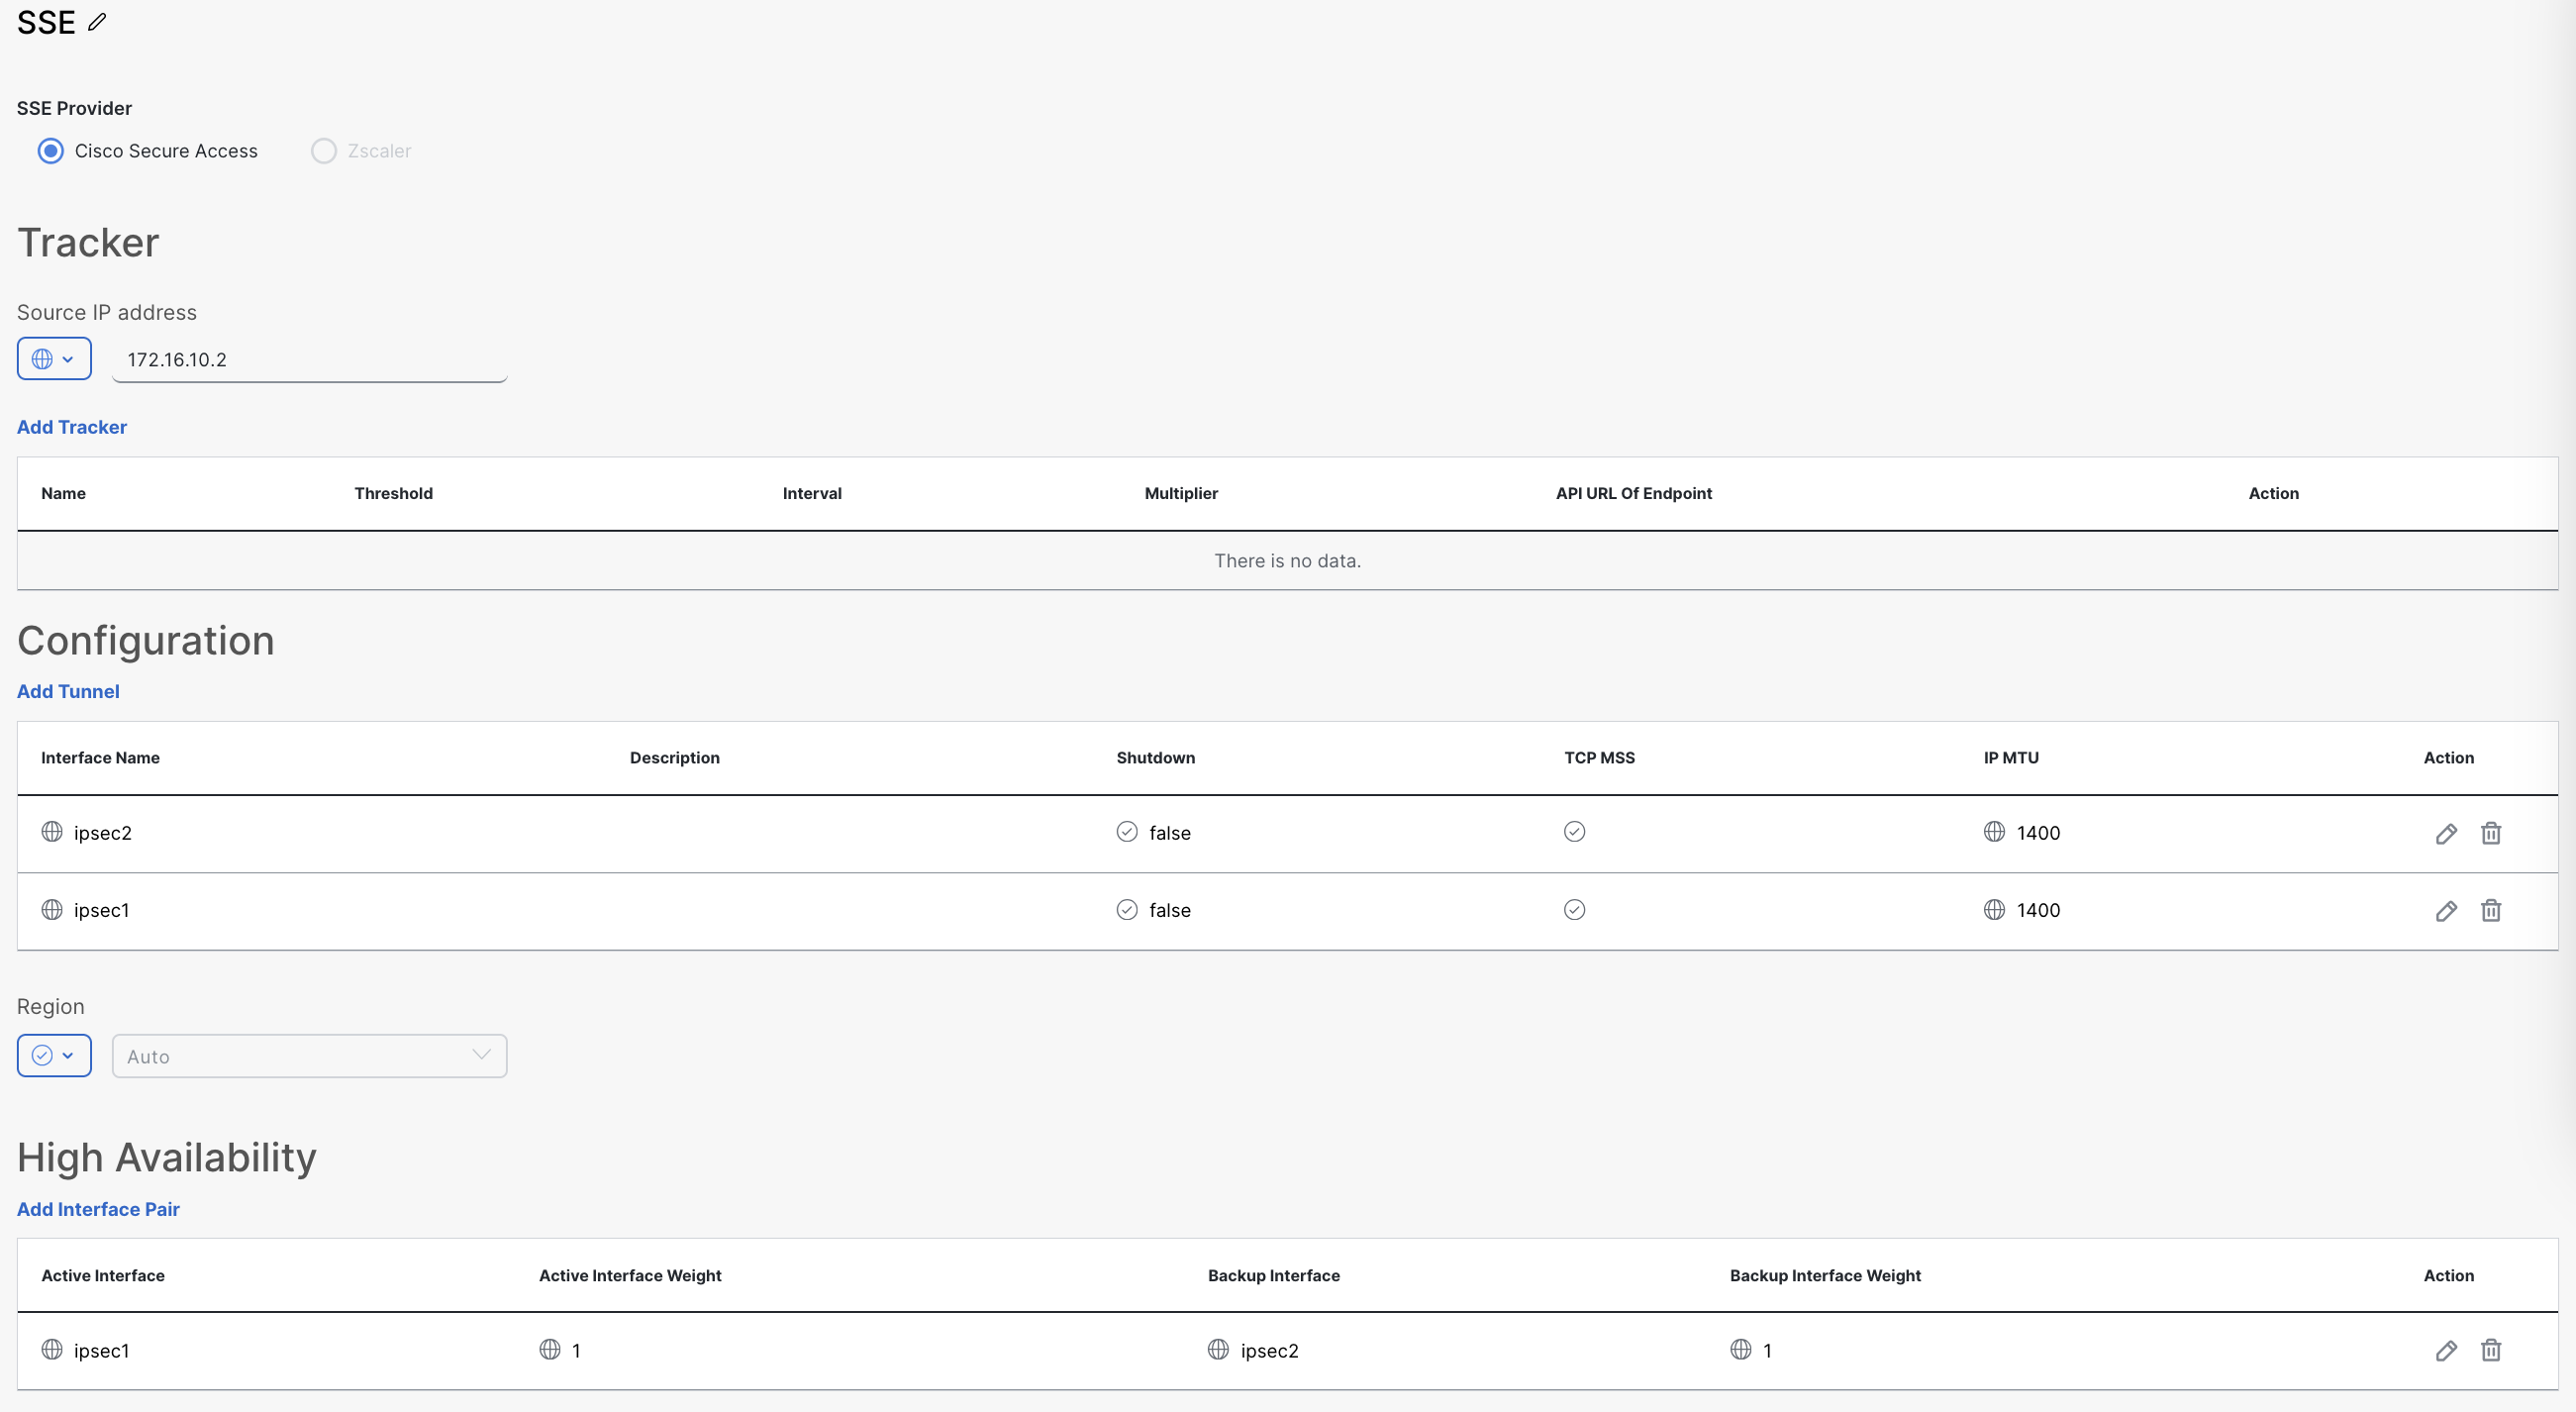
Create SSE Policy on the Manager
You need to create a new SSE Policy. This is where you input information about the IPSec tunnels.
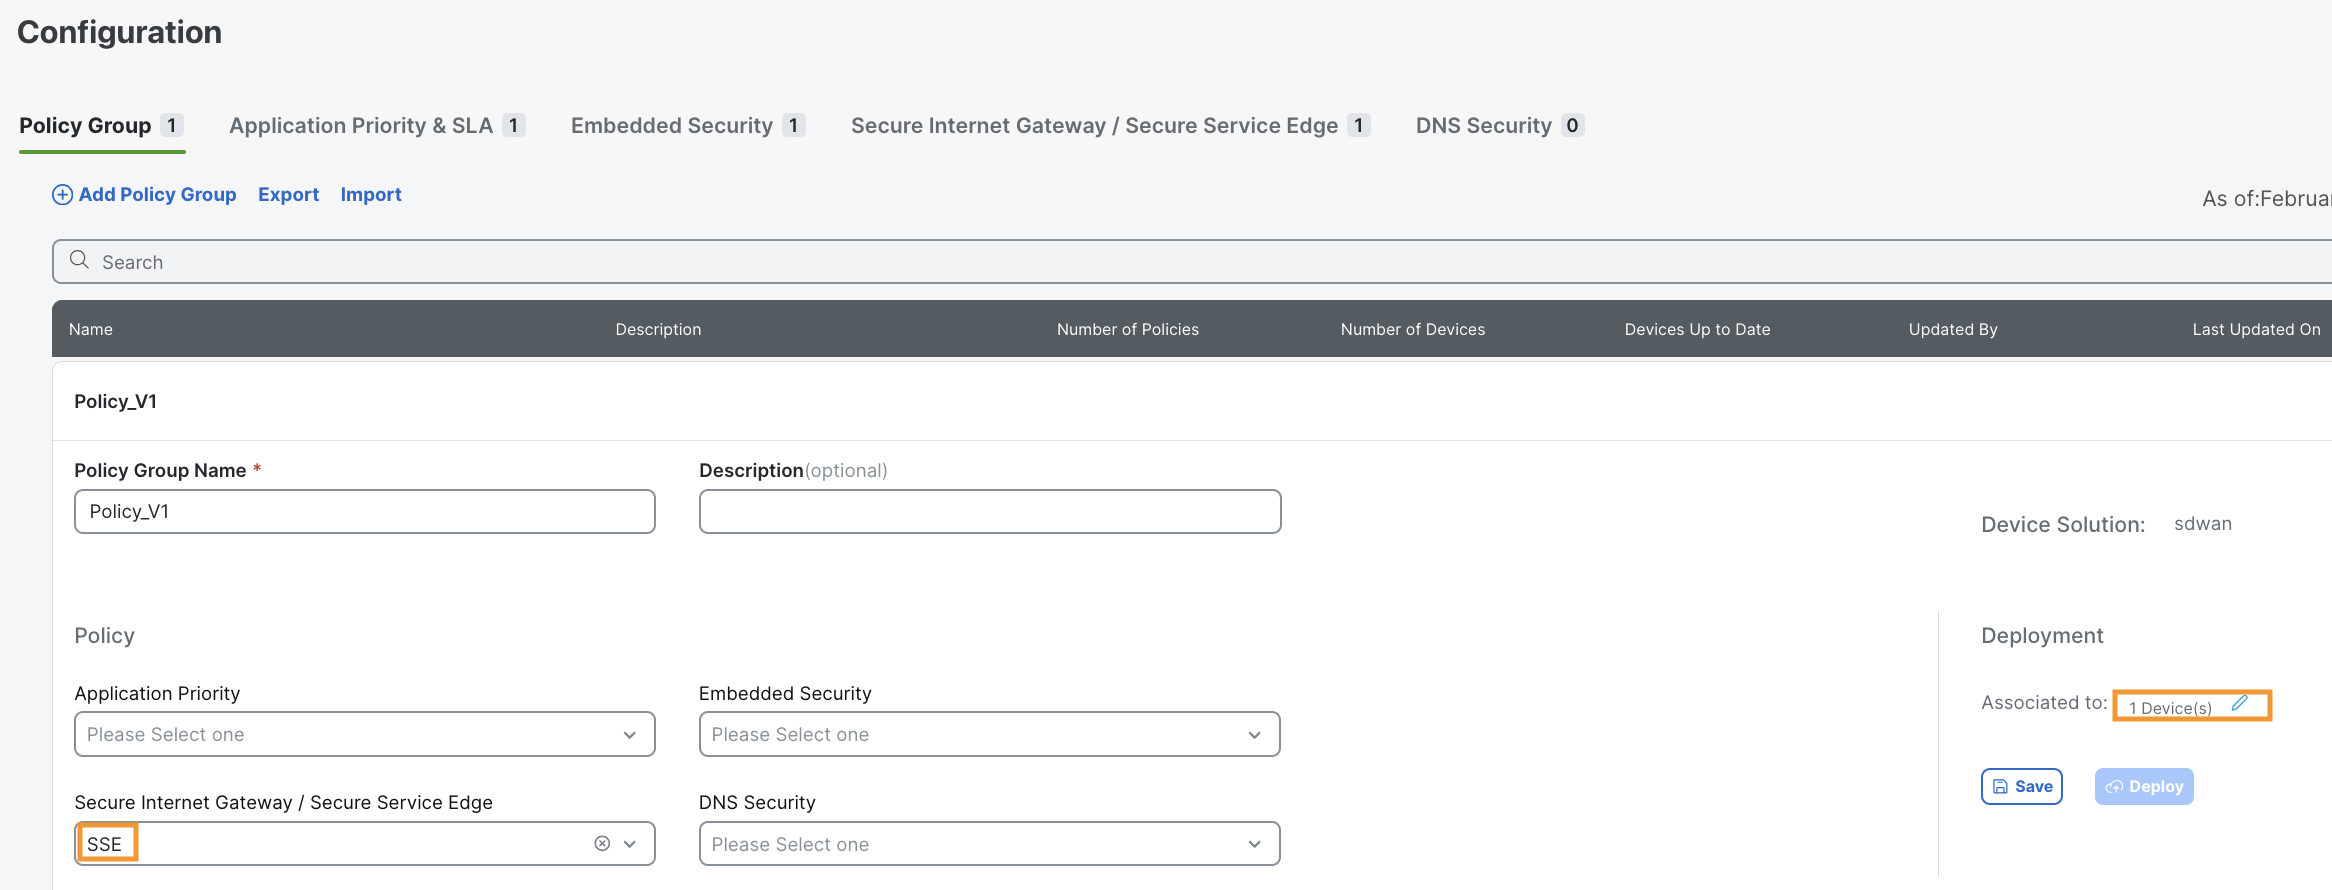
From Configuration > Policy Groups > Secure Service Edge
The following is the minimum you need:
- Tracker IP - Used to confirm the tunnel is operational.
- Tunnel - At least 1 tunnel. Enter tunnel name, source interface and select primary/secondary DC
- Interface Pair - Specify active and backup tunnels. Select none as backup if there’s only 1 tunnel.
Note You can select the SSE region of your preference or use Auto to automatically select it.
Then, create a Policy Group, associate a device and add the SSE policy
Redirect service side traffic
Now, we need to redirect traffic from users to the tunnel. There are two options:
Service Route of type SSE
On the Service VPN feature, add a Service Route with SSE Provider Cisco-Secure Access
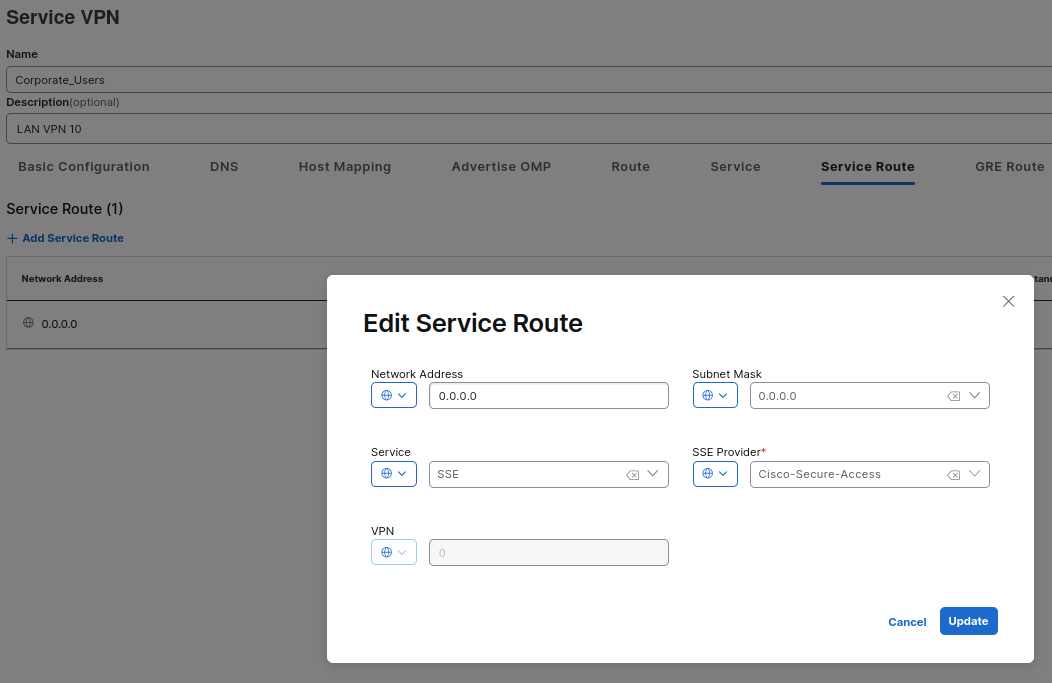
This will be added in the following way:
ip sdwan route vrf 10 0.0.0.0/0 service sse Cisco-Secure-Access
You can select what traffic gets forwarded to SSE by modifying the route, however this approach doesn’t give a lot of flexibility compared to the second option.
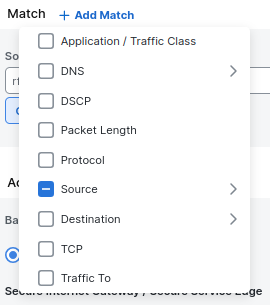
Data Policy
Data Policies provide more flexibility to redirect traffic. We can not only match on the destination, but also on other useful elements such as source, applications and more.
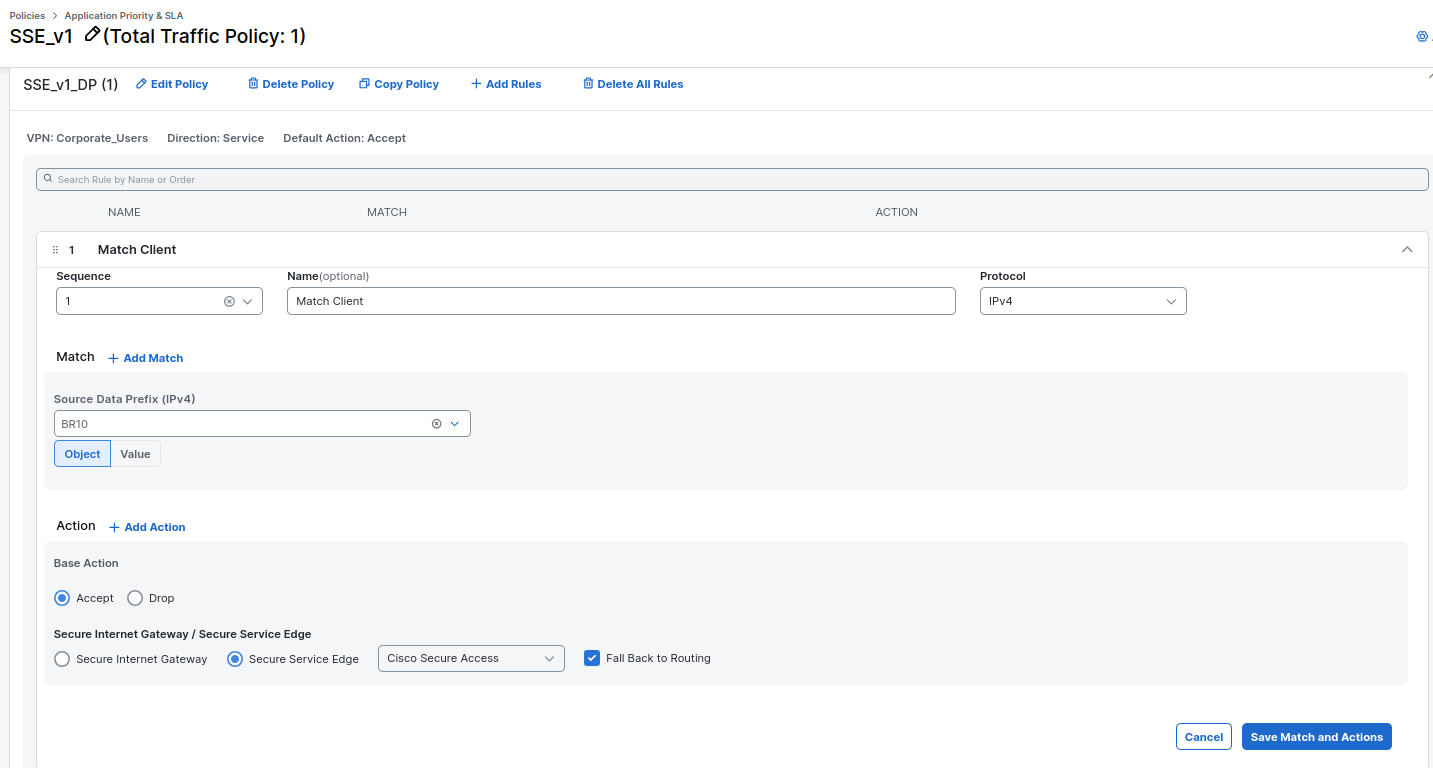
This is an example matching all traffic coming from my VPN 10 users and setting an action of Secure Service Edge. Notice that we can enable the option to Fallback to routing in case tunnels are unavailable.
Validations from the Manager
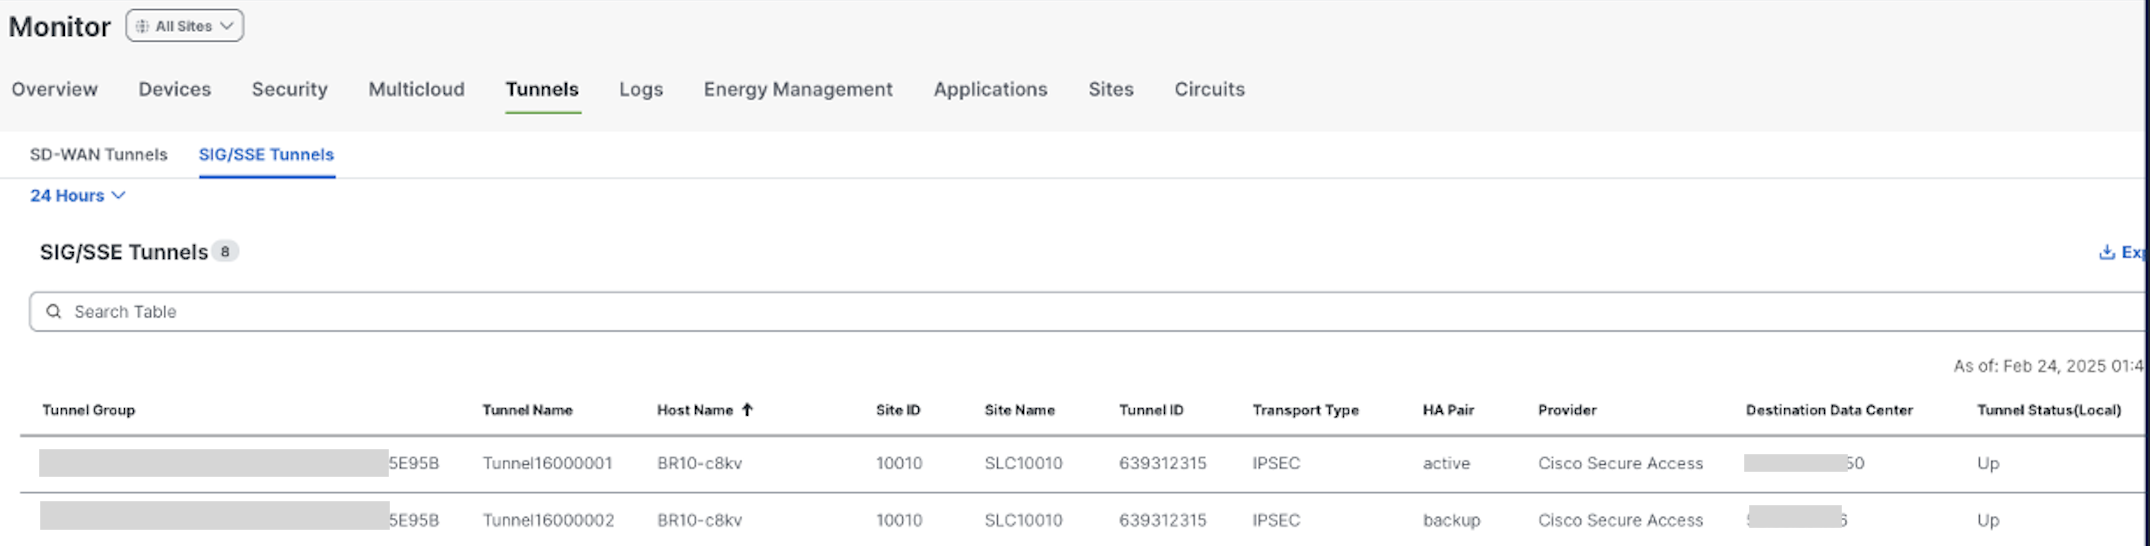
Check the tunnel status from Monitor > Tunnels > SIG/SSE Tunnels
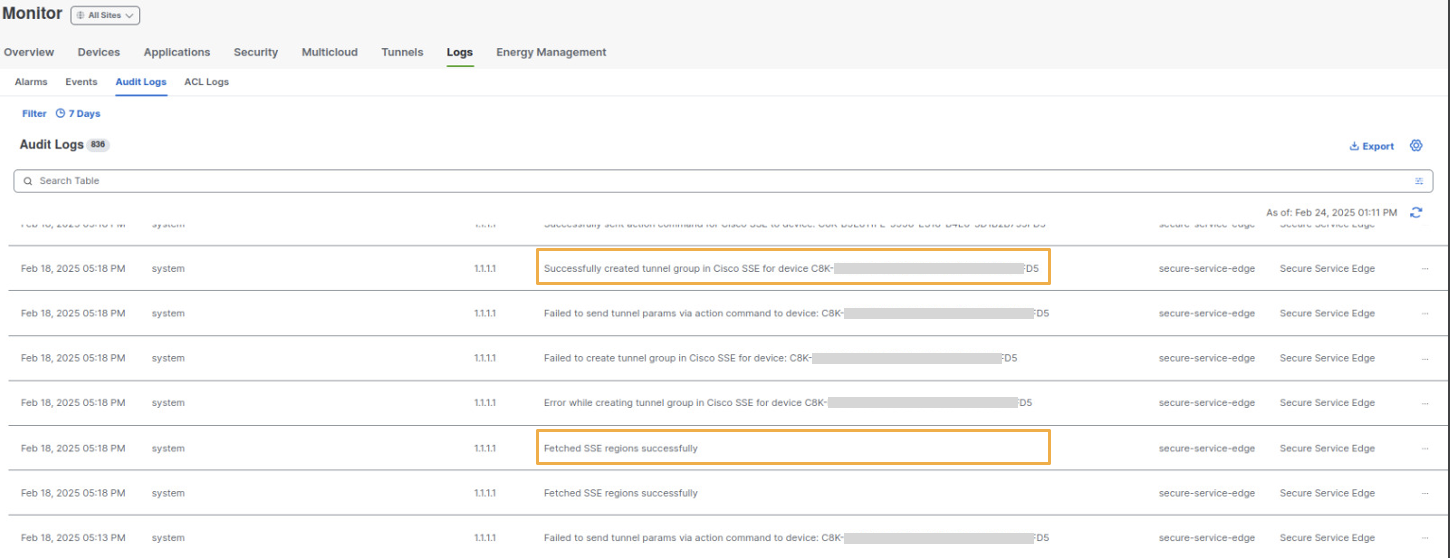
Logs are available and are useful to determine if there are any issues forming the tunnels
Validations from the User
To verify that users are using SSE we have a couple of options
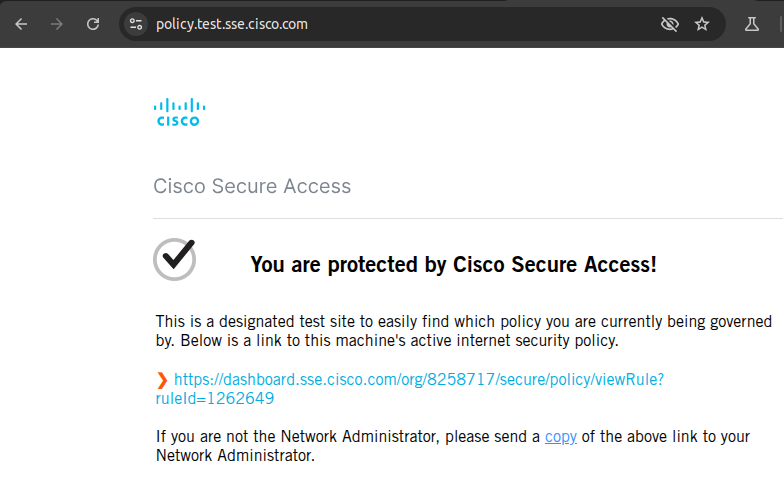
The first one is to visit policy.test.sse.com, if traffic is correctly redirected it will show something like this:
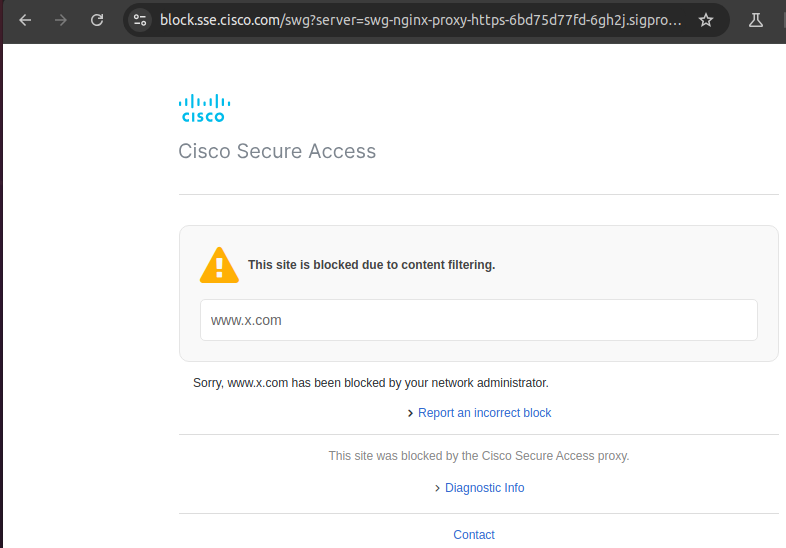
On SSE side, there is a policy denying traffic to social media apps, let’s see the result of trying to access x.com
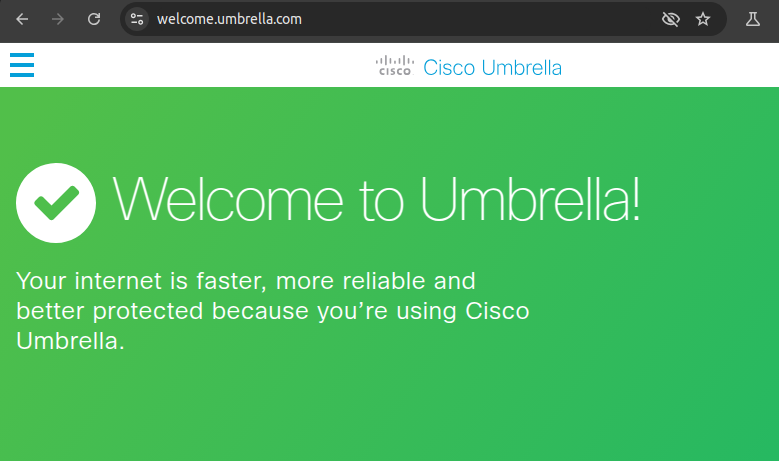
Lastly, accessing welcome.umbrella.com will let us know if user is protected
Additional considerations
- ECMP is available when multiple tunnels are active.
- Un-equal load balance can be achieved through weight assignment to IPSec tunnels.
- Fallback to routing is available when tunnels aren’t available
- Trackers are customizable - custom URL and thresholds to meet desired SLAs
- In-built dampening mechanism on tunnels to avoid flapping
- Data policy redirection provides greater flexibility than static sdwan routes
- Use Loopback interfaces to create multiple tunnels
I hope you have learned something useful! See you on the next one 👋